Pumpkin carving dates back 100′s of years, and had it’s beginning in Ireland. It didn’t even involve a pumpkin then, but a turnip!
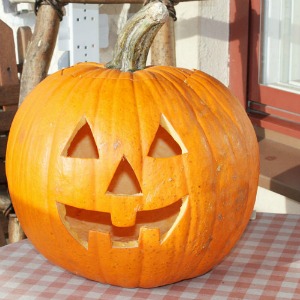
Pumpkin Carving

Todays pumpkin carving has evolved into a fun activity for kids and adults alike, and can go from the basic, to very detailed and intricate designs. If you would like to read it’s history in more detail, you can do so HERE.
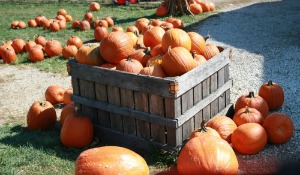
Today’s tip is about carving that perfect pumpkin you found. For tips on choosing the perfect pumpkin, go HERE.
Carving Tips
Choose a large pumpkin. The larger the pumpkin, the easier it is to carve. Pumpkins with a lighter color tend to be softer and easier to carve.
Plan on carving no earlier than a day or two before Halloween-jack-o’-lanterns have short “step” lives. And remember to bring your porch pumpkin indoors on nights when the temperature is expected to drop below freezing.
When cutting out the top, place the knife at a 45 degree angle so the the lid will have a place to rest when you replace it. If you cut straight down, the lid will fall through.
For longer life, soak the cleaned pumpkin a couple of hours in a bleach water solution of 1 teaspoon bleach to 1 gallon of water. Dry thoroughly, then rub inside and out, including all cut edges, with vegetable oil or petroleum jelly to prevent shriveling. If the pumpkin begins to shrivel, repeat the process. The soaking time will depend upon how dried out the pumpkin has become.
Scrape and scoop out seeds and stringy flesh with a large spoon. The pumpkin wall should be approximately 1″ thick.
Draw your design on the pumpkin with a water-based marker beforehand. Mistakes are erased easily with a damp sponge.
A good tool to have is a mini hand held saw. It’s safer then a sharp knife, and makes cutting much easier. You can also buy pumpkin carving kits at any major retailer if you wish. Always supervise children when they are carving their pumpkin.
Saw slowly and gently. Your saw is not a knife, don’t cut with it. Saw. Too much force can cause you to damage the pumpkin.
Start at the center of the design and work outwards, each time you remove a piece of the design, the pumpkin gets weaker.
Reattach a section that is accidentally removed by using a toothpick to pin it back in place.
Make design holes large enough to provide adequate ventilation for the candle. Make sure the flame is not too close to the top of the pumpkin, or better yet, a small battery-operated flameless candle is a safer choice than traditional candles for lighting your jack-o’-lantern.
If you do use a candle, a votive candle, placed in a clear glass candle holder is safer and will actually last longer.
Flatten a spot in the base of the pumpkin for the candle but avoid digging too deep because the pumpkin becomes prone to rot.
Sprinkle the bottom side of the pumpkin lid with ground cinnamon, nutmeg, and/or cloves to let your jack-o’-lantern do double duty as an air freshener.
Now gather your family around and have a pumpkin carving party!
Info Credit: about.com, familyfun.com, Pumpkin Masters, Walt’s, Pumpkin Carving 101